Showing posts with label Vegetarian Curries. Show all posts

Friday, September 21, 2012

Potato Curry

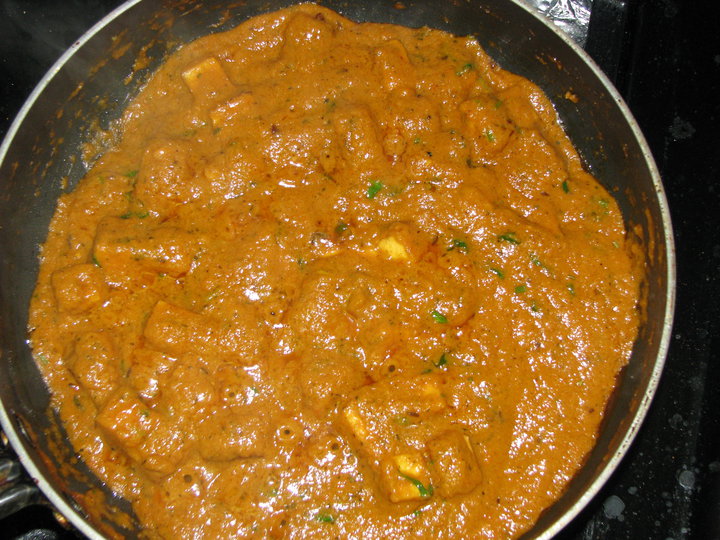
Potato curry with Poori
There are quite a lot of variations in Potato curries. This one is popularly known in India as Aaloo sookhi bhaaji. Aaloo is potato, sookhi meaning dry and bhaaji is curry. Unlike the traditional recipe, my mom's version of this dish was not dry at all, which is what made this dish one of her signature dishes. This particular one here is normally served as a brunch in my household on weekends. It has to be served along with some piping hot pooris. Poori and this potato curry is an awesome combination, just a match made in heaven. Enjoy!!

Ingredients:
Boiled and peeled potatoes - 1 lb
Onion - 1 small
Tomato (optional) - 1 small
Oil - 2 tbsp 
Bengal gram (chana dal) - 1 tsp
Mustard seeds - 1 tsp
Cumin seeds - 1 tsp
Green chillies - 2
Turmeric- 1/8 tsp
Coriander powder - 1 tsp
Ginger garlic paste - 1/2 tsp
Curry leaves - few
Coriander leaves - few sprigs
Salt - to taste


Method: 

1. Take the boiled and peeled potatoes in a large bowl and mash them using a fork into coarse chunks.

2. Heat a wide non-stick pan on the stove. Add the oil.

3. After the oil is hot enough add the mustard seeds. Let them crackle. Add the cumin seeds. Let them sizzle.

4. Now add the chana dal. Fry for 10 seconds till they turn golden.

5. Then add the chopped onion, curry leaves and the green chillies. Saute till the onions turn translucent. Add ginger garlic paste and fry till the raw flavor is gone.

6. Then add the turmeric and the coriander powder. Saute till the raw smell of the turmeric is gone.

7. Now add the mashed potato chunks. Add salt to your taste and mix well till all the spices are well combined with the potatoes.

8. At this stage add some water and adjust it to your desired consistency.

9. Garnish it with some chopped coriander leaves. Serve hot.

Tasty Tips:

1. This dish thickens up as it cools, so add water accordingly.

2. If you are unlike me and prefer the dry version of this dish, do not mash the potatoes after you boil them; just chop them into bite size pieces and avoid adding water in the end.

Friday, February 25, 2011

Spinach Fry

Spinach Fry
Spinach fry is one of my favorite vegetarian dishes. Spinach is an excellent source of iron. What makes this recipe special is that it tastes just like any mutton curry with minimal spices. Enjoy!!

Ingredients:
Spinach - 1 lb
Onion - 1 large
Garam masala - 1 tsp
Ginger garlic paste - 1 tsp
Cumin seeds - 1 tsp
Green chilli paste - 2 tsp or to taste
Turmeric powder - 1/4 tsp
Coriander powder - 1 tsp
Dry coconut powder - 2 tsp
Roasted peanut powder - 1 tsp
Salt - to taste
Oil - 3 tbsp

Method:
  1. Rinse the spinach well under cold water. Keep aside to drain well. 
  2. Finely chop the spinach and keep aside.
  3. Finely slice the onions.
  4. In a wide pan, add the oil.
  5. Add in the cumin seeds and allow them to crackle.
  6. Add in the garam masala.
  7. Now add in the sliced onions. Add some salt. Fry well till they are slightly golden brown on a medium flame.
  8. Now add in the ginger garlic paste, green chilli paste and saute for a minute.
  9. Add in the turmeric powder and the coriander powder. Combine well.
  10. Now add in the chopped spinach. Mix well. Cover it with a lid for 5-6 minutes. Stir in between.
  11. Check for the seasonings and adjust the spices according to your taste. Cook well till the oil separates from the sides of the pan.
  12. Add in the coconut powder and the roasted peanut powder. Combine well.
  13. Cover it and cook for a minute or two. 
  14. Turn off the heat and serve hot. 
Tasty Tips:

  1. Onion is the key ingredient in this dish. Frying the onions on a slow flame gives them a nice caramelized coating, which gives this dish a unique flavor. 
  2. The quantity of spinach looks like a lot but it wilts down to nothing. This recipe serves 2-3 people.
  3. To retain the vibrant green color of the spinach, its important to rinse it under cold water only.
  4. This dish goes excellent with hot steaming rice.

Thursday, February 3, 2011

Tomato Curry

Tomato Curry
Tomato curry is such a unique dish that just wakes up your taste buds. This is a life saver when you have no vegetables lying around. I have so many childhood memories associated with this dish. My mom used to make the plain daal to go along with this dish.  Make in bulk because the left over tastes even better. Enjoy!!


Ingredients:
Tomatoes - 1 lb
Onion - 1 large
Cumin seeds - 1 tsp
Mustard seeds - 1 tsp
Fenugreek powder - a pinch
Asafoetida (hing) - a pinch
Curry leaves - few
Dagad phool / Biryani puvvu - 1 floret
Garam masala - 1/2 tsp
Ginger garlic paste - 1 tsp
Turmeric powder - 1/4 tsp
Red chilli powder - 1 tsp or to taste
Coriander powder - 2 tsp
Dry coconut powder - 2 tsp
Toasted sesame seed powder - 2 tsp
Sugar - 1/2 tsp
Salt - to taste
Oil - 5 tbsp
Coriander leaves - few sprigs


Method
  1. Wash and dice the tomatoes and keep them aside.
  2. Finely chop the onions.
  3. In a wide non-stick pan, heat the oil on a medium low flame.
  4. When the oil is hot, add the asafoetida, fenugreek powder, the dagad phool, the cumin seeds and the mustard seeds and allow them to crackle.
  5. Add the garam masala.
  6. Now add in the roughly chopped curry leaves and the chopped onions. Add some salt to help the onions cook faster.
  7. Saute till the onions are translucent.
  8. Now add the ginger garlic paste. Saute for a minute.
  9. Add in the turmeric powder, the red chilli powder and the coriander powder. Saute till the spices blend well with the onions.
  10. Add the tomatoes. Add some salt and mix well. Cover the pan with a lid and let it cook on a medium low flame till the tomatoes are softened and you see oil separating from the sides of the pan. Keep stirring in between.
  11. Now check the seasonings and adjust the spices according to your taste.
  12. Add in the dry coconut powder and the toasted sesame seed powder.
  13. Add in the sugar. Mix well. Cover it and let it simmer gently for a minute or two. 
  14. Sprinkle in the freshly chopped coriander leaves and serve hot with chapati or rice.
Tasty tips:
  1. Fenugreek powder is the key ingredient in this dish. It is very pungent and bitter, so a little bit goes a long way. I usually add this powder to all my sour tasting dishes. The bitterness in the fenugreek powder compliments any sour tasting dishes.
  2. Dagad phool is another key ingredient in this dish. It is otherwise called Biryani flower, which I use extensively in all my biryani recipes, sambaar and many of my meat dishes. The moment it hits the hot oil/ghee it just smells divine. It is a dried lichen. It has a unique flavor, quite woody and earthy aroma. It is easily available in any Indian grocery stores.
Dagad phool/Biryani puvvu   
  1. Sesame seeds powder adds a unique nutty flavor to this dish. Do not forget to toast the sesame seeds before you blend them into a fine powder. Toasting enhances its flavor.
  2. You can also make a variation by adding fenugreek leaves in the end to this dish. It tastes excellent too.
  3. This dish tastes even better the day after. It tastes awesome hot or room temperature. Goes excellent with rice or chapati or even a slice of bread.

Tuesday, January 18, 2011

Paneer Makhani

Paneer Makhani
Paneer is generally known as Cottage cheese. Makhan is butter in Hindi hence the name Paneer Makhani. This is a super hit party dish that your friends will devour, leaving you feel like a master chef. Enjoy!!

Ingredients:

Paneer (Cottage cheese) - 1lb
Onion - 2 medium
Tomato - 1 medium
Cashews - 2 tbsp
Garam masala - 1 tsp
Bay leaf - 1
Cumin seeds - 2 tsp
Black cumin seeds (Shahi Jeera) - 1 tsp
Ginger garlic paste - 2 tsp
Turmeric powder - 1/4 tsp
Red chilli powder - 2 tsp or to taste
Coriander powder - 2 tsp
Sour cream - 1 tbsp
Coriander leaves - few sprigs
Orange food color - a pinch (optional)
Salt - to taste
Sugar - 1/2 tsp
Butter - 5 tbsp
Heavy whipping cream - 2 tsp (Optional)
Kasoori methi (Dried fenugreek leaves) - 1 tsp
Oil - 1 tbsp
Oil - to deep fry the paneer

Method:
  1. Cut the paneer into bite size cubes and keep them aside.
  2. In a deep pan, pour enough oil to deep fry the paneer cubes. Fry the paneer cubes till golden brown on all sides. 
  3. Put these fried paneer in cold water immediately. Let them sit in the water till you prepare the rest of the dish.
  4. In another pan, put 2 tsp of oil. Fry the chopped onion till golden brown. Keep it aside to cool. Now blend the fried onion to a smooth paste.
  5. Fry the cashews in some oil till golden.  Allow them to cool down. Blend them into a smooth paste using a little water.
  6. In the same pan, fry the tomato and allow it to cool down. Now blend it into  a smooth paste and keep it aside.
  7. Put a non-stick pan on a medium flame, add the butter and the remaining oil to it. 
  8. Once it is hot, add in the garam masala, the black cumin seeds and the cumin seeds. Let them crackle.
  9. Now add in the bay leaf and the onion paste. Saute for 2 minutes.
  10. Add the ginger garlic paste. Fry for a minute.
  11. Add in the cashew paste and fry till the oil separates from the edges of the pan.
  12. Add the tomato paste. Fry for a minute.
  13. Now add the sugar.
  14. Add in the turmeric powder, red chilli powder and coriander powder. Fry the spices till the raw flavor is gone and oil is separated.
  15. Add in the salt. Add in the sour cream. Mix well.
  16. Now check the consistency and add water if required. 
  17. Dissolve a pinch of orange food color in some water and add it to the onion mixture. Mix well.
  18. Now squeeze out the water from the paneer cubes. Add them to the onion mixture.
  19. Mix well, be careful not to break the paneer cubes. 
  20. Crush the kasoori methi between your palms and add it to the dish. Mix well. Turn off the stove.
  21. Drizzle some heavy whipping cream for a better presentation.
  22. Finally sprinkle in some freshly chopped coriander leaves.
  23. Serve hot with chapathi or paratha or hot steaming jeera rice.
Tasty Tips:
  1. Be very careful while frying the paneer. Paneer tends to pop in hot oil. Use a splatter screen if necessary.
  2. Paneer tends to harden on deep frying. Soaking the paneer in water as soon as its out of hot oil,  helps it remain soft. So this step is mandatory.
  3. Sugar brings out the flavors of the spices and the sour cream. A small amount would do.
  4. Sour cream gives depth to this dish, but if you are watching your diet you can substitute it with plain yogurt instead.
  5. Cashew paste tends to stick to the pan, so a non-stick pan would be a life saver.
  6. You can get the kasoori methi in any Indian grocery store.

Wednesday, January 5, 2011

Soy Chunks Curry

Soy chunks curry

We used to call this dish Meal maker curry when we were kids. I don't know where that name came from but it is definitely a hearty dish that satisfies your palate. This is a super alternative dish for those meat cravings and it is packed full with proteins. Enjoy!!

Ingredients:


Soy chunks - 1/2 lb
Onion - 1 large
Tomato - 1 large
Cumin seeds - 1 tsp
Garam masala - 1 tsp
Ginger garlic paste - 2 tsp
Turmeric powder - 1/4 tsp
Red chilli powder - 2 tsp
Coriander powder - 2 tsp
Bay leaf - 1
Poppy seeds - 1 tbsp
Dry coconut powder - 1 tbsp
Curry leaves - few sprigs
Mint leaves - few
Coriander leaves - few
Oil - 4 tbsp
Salt - to taste

Method:

  1. Put the Soy chunks in a microwave safe bowl and add some water till the chunks are submerged in it. Add some salt to it.
  2. Microwave the Soy chunks for 3 - 4 minutes or till the chunks are softened.
  3. After the Soy chunks are soft and cooked, drain the water and squeeze out the excess water from them. Cut the chunks if they are too big.
  4. In a pan, put very little oil and add the chopped onion to it. Fry the onion till golden. Turn off the heat and put the fried onion in a separate plate and allow it to cool down before you blend it into a paste.
  5. In a clean pan, dry roast the poppy seeds till pale brown on a very low flame. Add in the coconut powder and toast till golden brown. Turn off the heat and allow them to cool down.
  6. Blend the poppy seeds and coconut mixture into a fine paste and put it in a bowl. 
  7. Blend the fried onion into a fine paste and put it in a bowl.
  8. Blend the tomato into a puree and put it in a bowl.
  9. Put another pan on a medium high flame and add the remaining oil to it. 
  10. Add the cumin seeds and let them splutter. 
  11. Now add the garam masala, the bay leaf and the onion paste. Add the curry leaves and the mint leaves. Fry till the oil separates.
  12. Add in the ginger garlic paste. Fry for a minute. 
  13. Now add in the poppy seed paste to it. Fry till the oil separates. 
  14. Add the turmeric powder, red chilli powder and the coriander powder. Fry for 2 minutes. 
  15. Add in the tomato puree and fry till oil separates.
  16. Now add in the Soy chunks. Mix well. Check the seasoning and some salt.
  17. Garnish with freshly chopped coriander leaves. 
  18. Serve hot.

Tasty Tips:
  1. This goes excellent with Jeera rice.
  2. Be very careful while toasting the coconut powder, it turns black in no time.

Thursday, December 16, 2010

Bhendi Fry

Bhendi Fry

Okra is one vegetable that my husband says a big yes to. All my childhood I was made to believe that eating okra improves one's math skills. I have no idea how true that is but it is definitely my family favorite vegetarian dish, and I guarantee it will be yours soon. Enjoy!

Ingredients:


Okra - 1 lb
Onion - 1 large
Curry leaves - few
Cumin seeds - 1 tsp
Ginger garlic paste - 1 tsp
Turmeric powder - 1/4 tsp
Red chilli powder - 2 tsp
Coriander powder - 2 tsp
Dry coconut powder - 2 tbsp
Salt - to taste
Oil - 3 tbsp

Method:
  1. Wash the okra and pat dry each okra with a paper towel. Chop them to 1/2 inch thick pieces and keep aside.
  2. Heat a wide non-stick pan and pour the oil in it. After the oil is medium hot, add the cumin seeds and allow them to splutter.
  3. Now add the chopped onion, some salt and saute till the onions turn translucent. 
  4. Add in the curry leaves, ginger garlic paste and fry till the raw flavor of the ginger garlic paste is gone.
  5. Add the turmeric powder, red chilli powder and the coriander powder and saute for a minute. 
  6. Now add in the chopped okra. Sprinkle some more salt. 
  7. Keep mixing till the stickiness from the okra is gone and you see oil oozing out. Do not walk away, keep stirring continuously, otherwise the okra on the bottom of the pan tends to burn easily.
  8. After the okra is dry and cooked through, sprinkle the coconut powder. Mix well and serve hot.
  9. It goes excellent with chapati.

Tasty Tips:
  1. Okra has a lot of capsules in it. It tends to get slimier when you cut through these capsules. So, be very careful while chopping the okra.
  2. Choose the okra that are thin, long and tender.
  3. Water contact is what makes okra more slimier. So make sure okra is really dry before you chop. Skipping this step increases the cooking time.
  4. Make sure you do not fry the onions too much before adding the okra. Onions fry along with the okra through the cooking process otherwise they tend to darken even before the okra is cooked.
  5. If your okra is taking too long to lose the stickiness, add in a few teaspoons of buttermilk. 
  6. A wide non-stick pan is definitely helpful.

Monday, September 6, 2010

Mushroom Fry

Mushroom Fry

Mushroom fry is such an easy dish that you can whip up in no time. Whether you're counting carbs or calories or just trying to include more healthy foods in your diet, this is a perfect dish. Enjoy!!

Ingredients:

White button mushrooms - 1/2 lb
Onion - 1 medium size
Cumin seeds - 1 tsp
Curry leaves - few
Garam masala powder - 1/2 tsp
Ginger garlic paste - 1 tsp
Turmeric powder - 1/4 tsp
Red chilli powder - 1 tsp
Coriander powder - 1 tsp
Dry coconut powder - 2 tsp
Salt - to taste
Oil - 3 tbsp
Finely chopped coriander leaves - 2 tbsp

Method:
Wipe the mushrooms clean with a damp cloth. Cut it into thin slices.

In a pan, heat some oil, add the cumin seeds and let them crackle. Then add the garam masala powder. Immediately add the finely chopped onion. Add some salt. Fry till the onions are translucent. Add the curry leaves. Then add the ginger garlic paste, fry for a minute. Add the turmeric powder, chilli powder and the coriander powder. Fry the spices for a minute. Then add the chopped mushrooms. Add some more salt. Mix well, cover and let it cook for 2 to 3 minutes. The mushrooms wilt down in no time. Add the coconut powder and mix well. Cover it and let it cook for two more minutes. Turn the heat off. Add the chopped coriander leaves.

Serve hot with chapati or hot steaming rice.

This should serve 2 - 3 people.

Mushroom Fry


Tasty tip:

Garam masala:

I make my garam masala fresh as and when needed. For 1/2 a tsp garam masala I powder one clove, one cardamom and a half inch cinnamon stick using a mortar and pestle.

Saturday, August 28, 2010

Mirchi Ka Salan

Mirchi Ka Salan

Mirchi ka salan is an exotic side dish to any biryani. Mirchi is green chilli in Hindi and Salan is a Hyderabadi lingo for a creamy sauce or curry. This is one classic Hyderabadi dish with a tangy peanut sauce. Enjoy!!

Ingredients:

Green Chillies - 8
Peanuts - 1/2 cup
Sesame seeds - 2 tbsp
Dry coconut powder - 3 tbsp
Tamarind - 1 tbsp (goose-berry size)
Turmeric powder - 1/8 tsp
Cumin seeds - 1/2 tsp
Hing(asafoetida) - a pinch
Curry leaves - few
Onion - 1 small
Ginger garlic paste - 1 tsp
Red Chilli powder - 1 tsp
Coriander powder - 1 tsp
Salt - to taste
Sugar - 1 tsp
Oil - 4 tbs
red food color (optional) - a pinch
Coriander leaves - 2 tbsp

Method:
Dry roast the peanuts till golden brown. Keep it aside to cool. In the same pan, toast the sesame seeds till it has a nice aroma. Let it cool in a plate. Now dry roast the coconut powder. Make sure the flame is very low while toasting the coconut powder. It tends to burn very quickly. Let it cool.

Soak the tamarind in some warm water till its soft and pulpy. Grind it into a smooth paste and keep aside.

Now blend the toasted sesame seeds, the peanuts and the coconut powder to a smooth paste adding water a little at a time.

The green chillies you choose should be a little thick. Give a small slit to the green chillies. Do not cut the stem off. Heat 2 teaspoons of oil in a pan and fry the chillies till the skin has some blisters. This gives some nice smoky flavor to the chillies and also cuts down the heat in them. Keep these fried chillies in a plate.

To the same pan add the remaining oil, add hing, add cumin seeds. Let the cumin seeds crackle. Now add the chopped onion and the curry leaves. Fry till the onion is translucent. Add the ginger garlic paste and fry till the raw flavor is gone. Add the peanut, sesame and coconut mixture to it. Stir well. When you see oil separating from the sides, add the spices, the turmeric powder, red chilli powder, coriander powder, salt, sugar. Mix well. Just when you see oil separating, add the tamarind pulp to it. Mix well. Add water and adjust to your desired consistency.

Dissolve a pinch of red food color in some water and add this to the above mixture. Mix well. Add the fried green chillies. Stir well. When you see oil on top, check the seasonings and add chopped coriander leaves. Turn the flame off.

Serve it as an accompaniment to any biryani or fried rice.

Safety Tip:

Be very careful while frying the green chillies in the oil. The green chillies tend to pop a lot in hot oil. If you don't slit the green chillies they burst in oil, which is very dangerous. So the cut is very important. Use a splutter screen if needed.  

Saturday, August 21, 2010

Baingan Bharta

Baingan Bharta

This is a super hit dish amongst the egg plant lovers. Egg plant when baked has a unique smoky flavor. The smoky flavor of the baked egg plant makes your taste buds crave for more. Although the method of this recipe looks tedious, it really is not. The end product is all worth the effort.

Ingredients:

Egg plant - 1
Onion (finely chopped) - 1 large
Tomato (finely chopped) - 2 medium sized
Mustard seeds - 1 tsp
Cumin seeds - 1 tsp
Curry leaves - few
Ginger garlic paste - 1 tsp
Turmeric - 1/8 tsp
Red chilli powder - 1 tsp
Coriander powder - 1 tsp
Salt - to taste
Oil - 3 tbsp
Cilantro (finely chopped) - 3 tbsp

Method:

Preheat the oven to 510 F. Make sure its in a bake mode.

Wash and wipe the egg plant dry with a clean kitchen towel.  Brush it with some oil. Make a few cuts on the egg plant with a knife. This is to prevent it from blasting inside the oven and to let it cook well from inside as well.

Now place the egg plant on a baking tray and bake it for 30 min or till the egg plant skin has some blisters. Keep an eye on it. Every oven temperature is different. You might also want to turn the egg plant round every now and then.

Let the egg plant cool a little bit. Now with your hands, peel the skin off. It should come right off. Discard the skin. Put the flesh of the egg plant on a chopping board and give it a rough chop with a knife. Put it aside.


Now put a pan on medium high heat. Add the oil. Add the mustard seeds. Let the mustard seeds crackle. Add in the cumin seeds. Now add the chopped onion. Saute it till the onions are translucent. Then add the curry leaves. Stir them in. Add the ginger garlic paste. Saute it till the raw smell is gone and the oil oozes out. Now add in the chopped tomatoes. Mix well and cover it with a lid till the tomatoes are cooked. This should take around 2-3 minutes. Then add in the turmeric, chilli powder, coriander powder, salt and saute well for a minute or two.

Add in the chopped egg plant. Mix well, turn the heat to medium low and cover it with a lid. Let it simmer for 3 minutes till the oil oozes out. Turn the heat off. Add in the chopped cilantro.

Baingan Bharta
 
Serve hot with chapati. It goes well with hot steaming rice too, but chapati is the best option. Enjoy !!

Tasty tips:

While choosing an egg plant always choose the one that has a nice green stem. The egg plant should have a vibrant purple color with a nice shine. Such an egg plant has less seeds and the flesh inside is whiter, which is more tastier.
Some people grill the whole egg plant on the stove top instead of an oven. But in US especially, the better option besides an oven would be a barbecue grill. 

Thursday, August 19, 2010

Sorakaya Senagapappu Koora

Sorakaya Senagapappu Koora
This is one of my favorite childhood dishes that my mom used to make quite often. Adding lentils to any vegetable not only adds extra proteins but also increases the quantity of the curry that you are making. 

Ingredients:

Sorakaya (Bottle gourd) – 1 medium size
Chana dal (Bengal gram/Senagapappu) – ¼ cup
Onion – 1 medium size
Cumin seeds – ½ tsp
Mustard seeds – ½ tsp
Ginger garlic paste – 1 tsp
Curry leaves – few
Coriander leaves- few sprigs
Turmeric – 1/8 tsp
Chilli powder – 1 tsp
Coriander powder – ½ tsp
Dry coconut powder – 1 tsp
Sesame seed powder – ½ tsp
Oil- 3 tbsp
Salt – to taste

Method:
I usually use a pressure cooker, when I use Chana dal in my curries.
First wash the chana dal until the water runs clear. Let the dal soak in a half cup of water. Meanwhile, put a pressure cooker on a medium flame and add the oil. Add the mustard seeds and wait till they crackle. Now add the cumin seeds. Then add the onions and some salt fry them till they are translucent. Add ginger garlic paste and fry for a minute. Then add the turmeric, chilli powder, coriander powder, and some salt and fry for a minute. Make sure the spices don’t burn. Drain the water from the chana dal , do not throw away the water. Then add the bottle gourd and the chana dal to the cooker. Mix well. After a minute, add the water that the dal was soaked in. Mix everything well. Cover with the pressure cooker lid. Let it cook for 2 whistles. The key here is not to let the dal mash up too much. It still has to have a bite to it. After the pressure goes off, open the cooker and check if the curry is watery. It usually is, coz bottle gourd has a lot of water in it. Now turn on the flame and keep the lid open and let the water in the curry evaporate. When you see oil oozing out, add the coconut powder and sesame powder. Mix well.


Garnish with coriander leaves and serve hot with steamed rice or chapatti. Enjoy!!

Tasty Tip:
Instead of adding all the salt at once, I usually add little by little as the recipe proceeds. Seasoning every layer of the dish. Always add the salt on the lesser side. The water in the dish evaporates as you proceed. Once the water is evaporated, you will be left with the actual taste of the salt. So if you have added more salt, after the water is gone, it leaves the dish salty. You can always add more salt if it needs but removing extra salt from the dish is definitely not pretty.